If you want to boost your Shopify store’s search rankings and track its performance on Google, setting up Google Search Console is essential. This free tool helps you monitor how your site appears in search results, fix indexing errors, and optimize for better visibility.
In this guide, we’ll show you the simple steps to verify and connect Google Search Console with your Shopify store. Let’s get started!
What is Search Console?
Google Search Console (GSC) is a free Google service that assists website owners in monitoring, maintaining, and troubleshooting their site’s appearance in Google Search results. Website owners may use GSC to validate that Google can discover and crawl their site, examine Google Search traffic data, and receive notifications when Google finds indexing, spam, or other difficulties on their site, among other things. GSC provides a number of filters and indicators for analyzing website performance and strategizing how to rank higher in Google search.
Google Search Console is an extremely effective tool that assists Shopify merchants in measuring their search traffic and performance, resolving issues, and ensuring that their site is optimized to appear in search results. Search Console is simple to set up on Shopify and is useful since it shows store owners which search phrases their site appears for in Google- Search. Connecting the store to Google Search Console as soon as possible is recommended in order to maximize the store’s visibility in search results.
The following are the steps you must take to integrate Google Search Console with your Shopify website:
Execution
Enabling Google Search Console Tool
1. Navigate to Google Search Console in your browser. Click Here
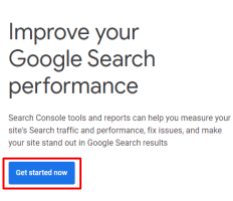
2. Click the Start Now button.
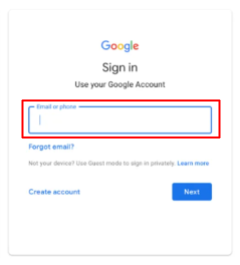
3. Sign in to your Google Account or sign up for a new one.
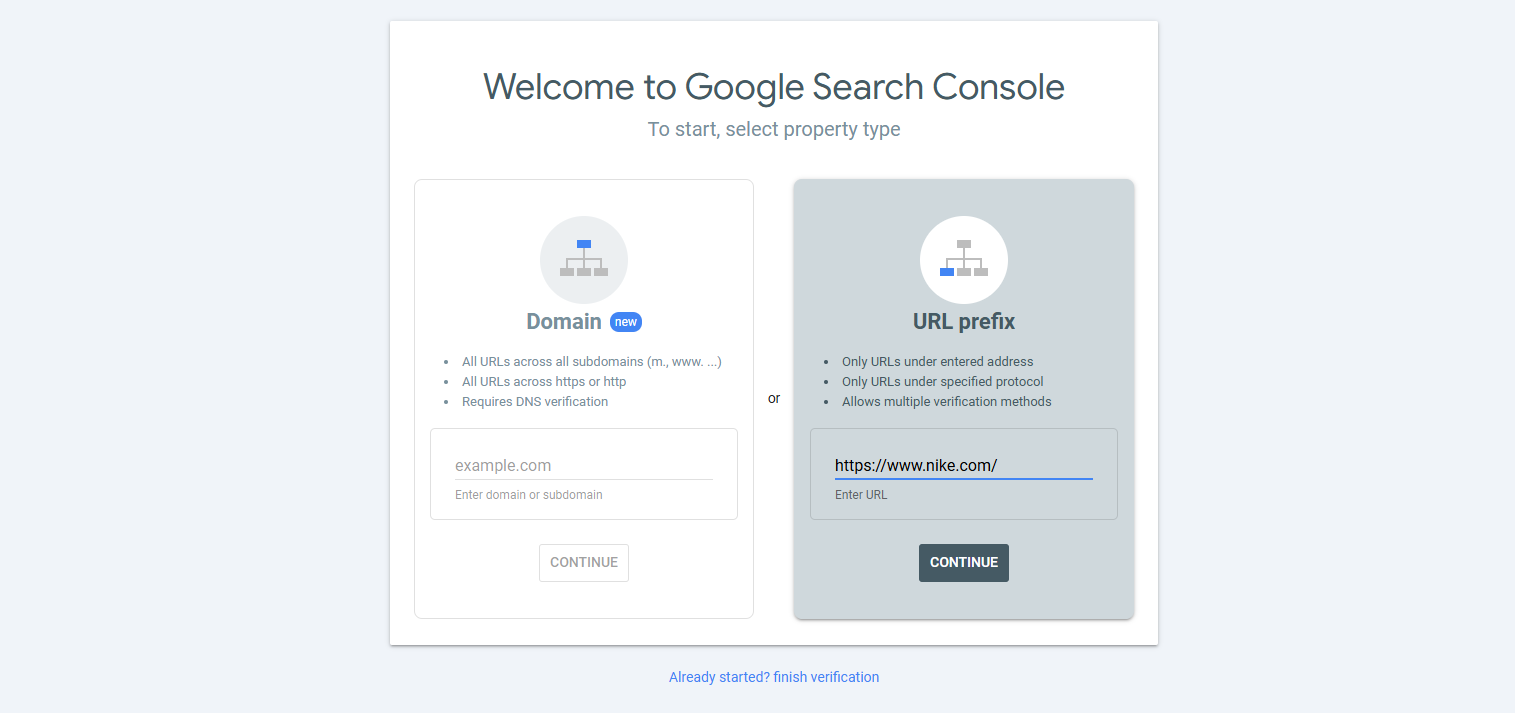
4. Go to the left side of the screen and click on search property. Scroll down and click the Add start now button.

5. Navigate to the URL prefix and type in the URL.
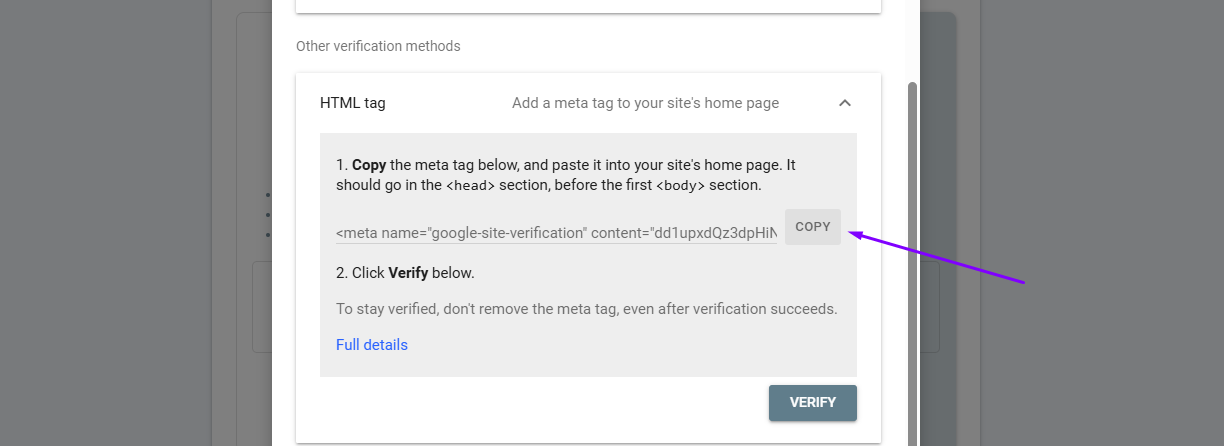
6. Copy the html Tag that we have to paste inside the shopify theme liquid.
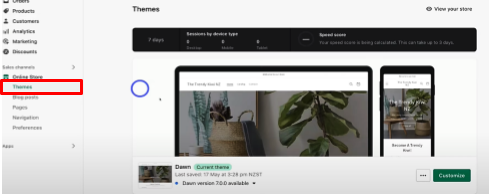
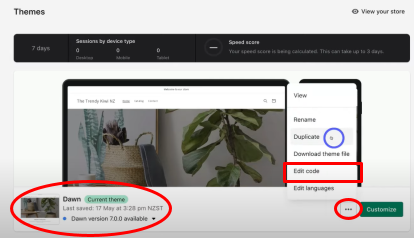
7. Scroll down to Online Store, then Themes.
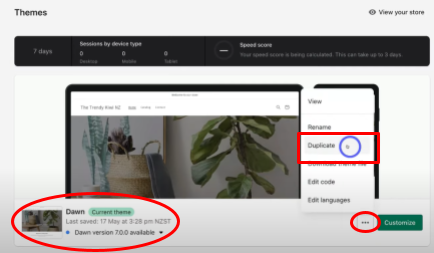
8. Navigate through the three dots beside the Current theme, then click Duplicate.
*This duplicate copy will act as a backup for your theme if something goes wrong with its coding.
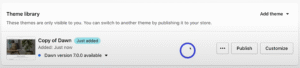
Duplicate copy:
9. Navigate back over to the three dots beside the Current theme, then click Edit Code.
10. Navigate to the left and choose theme. liquid.
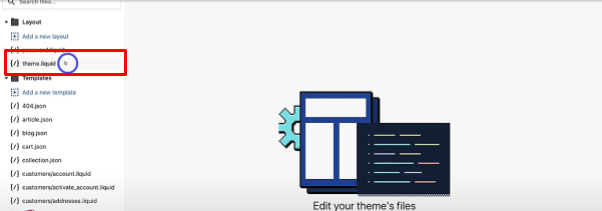
11. Navigate to the left and choose theme.liquid.
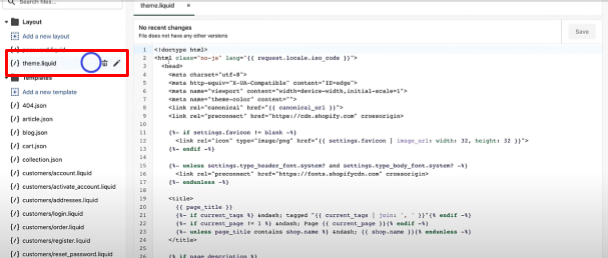
12. Locate the theme.liquid HTML’s head and press enter to add spacing.
13. Copy the HTML meta tag from Google Search Console (Step 15), paste it into the allotted space, and save it.
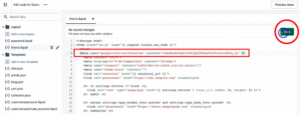
14. Your Google Search Console HTML meta tag has been paired with your Shopify theme. Return to Google Search Console by clicking the Exit button.
![]()
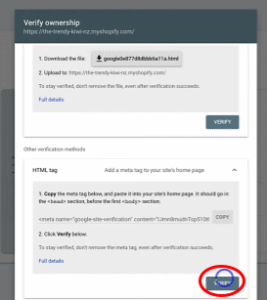
15. Scroll down to the HTML tag, then click the drop-down arrow and then the Verify button.
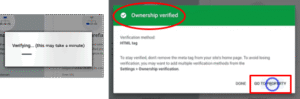
16. This may take a few minutes, but you will notice that the ownership has been confirmed using the HTML tag. Then scroll down and click the go to property button.
17. Congratulations! You have now successfully connected your Google Search Console to your Shopify store. The Google Search Console dashboard is displayed below. This is where you may monitor the performance of your website in Google Search.


